
.avif)
.svg)

Table of Contents

Published on
5/3/26
-
5 min
E-commerce is a booming market, and more and more companies are turning to the web to sell their products or services. If you want to create your own e-commerce site, Webflow is an interesting option.
Webflow is a no-code website builder that offers many advanced features for e-commerce businesses. With Webflow, the essential tool for creating a professional website without writing a single line of code, you can set up your online store, generate your first visitors, and make your first sales to grow your business exponentially.
In this article, we'll show you how to create an e-commerce website with Webflow. We'll guide you through the different steps, from selecting a template to publishing your site.
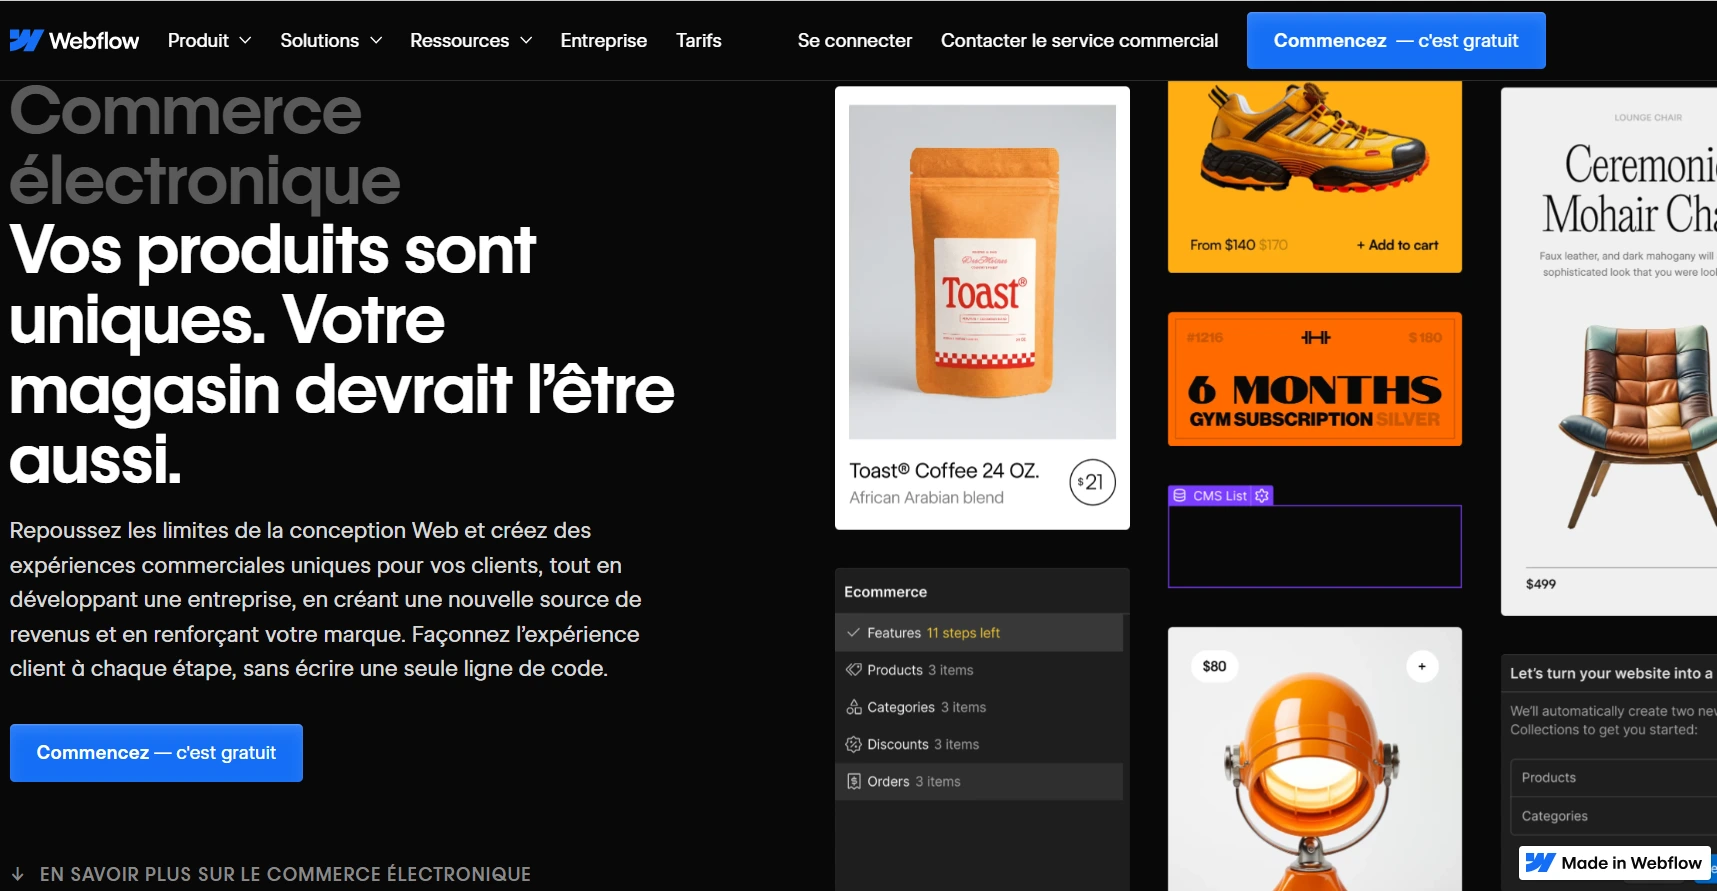
The first step is to choose a template for your e-commerce site. Webflow offers a wide selection of responsive e-commerce templates, suitable for all types of stores.
Here are a few things to consider when choosing your template:
The first thing to consider is the appearance and layout of the template. The template should match your brand image and graphic charter. It should also be user-friendly and easy for your customers to navigate.
The template should offer the features you need for your online store. For example, if you sell physical products, you will need a template that offers a section for products, a section for the shopping cart, and a section for payment.
The template must be adapted to the number of products you want to sell in your store. If you sell a large number of products, you will need a template that offers a search section and a filter section to improve your site's UX.
Here are some questions you can ask yourself to help you choose the right template:
By answering these questions, you will be able to narrow down your choices and meet your needs and those of your customers.
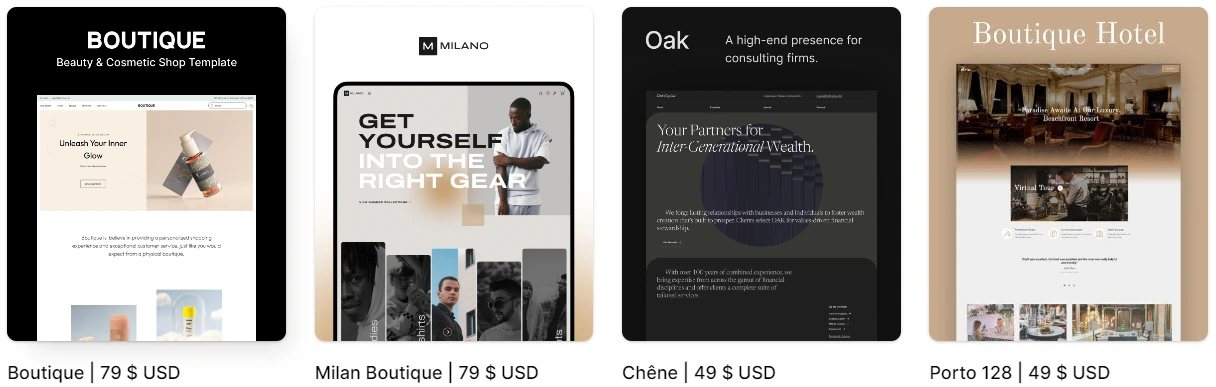
Finally, we recommend that you learn about Webflow's features, templates, and the different options available to you, as well as user reviews. To help you do this, Webflow offers a range of concrete examples. In fact, many custom Webflow templates are posted online every day, thanks to Webflow's selection of the best and most popular templates, as you can see in the photo below:

Here are some examples of popular e-commerce templates on Webflow:
You can also check out our article on the different Webflow templates for more information on this topic.
Webflow offers many features that allow you to create your own design for your e-commerce site, but be aware that using this software from scratch can be tedious, so don't hesitate to seek help from a digital agency to avoid wasting time.
Because with EasyWeb, selling online is easy!

Once you have chosen a template, you need to set up your store. This step involves adding your products, categories, prices, and payment methods.
Follow these steps:
A collection is a group of products that are related to each other. To create a new product collection in Webflow, follow these steps:
Your collection will be created and you will be redirected to the collection details page. On this page, you can add products to your collection, configure the collection settings, and customize the appearance of the collection.
To add products to your collection, click the "Add Product" button. You can also import products from a CSV list or another source.
To configure the collection settings, click the "Settings" button. Here, you can configure the following:
To customize the appearance of the collection, you can use the elements in the Webflow creation bar. You can also use CSS to modify the collection code.
Here are some tips for creating a product collection in Webflow:
The product name is the first thing customers will see, so it's important to choose a clear and concise name that reflects the product you're selling.
The product description is one of the most important elements of your product page. It should provide customers with all the information they need to make a purchase decision.
The product description should include the following:
Determining the price of your product is one of the most important decisions you will make as an e-merchant. The price of your product will have a direct impact on your sales, profit margin, and brand image.
There are several factors to consider when determining the price of your product, including:
Here are some methods you can use to determine the price of your product:
Choose the most appropriate method based on your product, market, and business strategy.
Product images are an important part of any online store. They allow customers to see the product before they buy it.
Good product images should be:
Here are some tips for choosing the right product images:
The product category allows customers to easily find the products they are looking for.
When choosing categories for your products, you should consider the following:
Here are some examples of product categories:
You can also create categories specific to your business. For example, if you sell eco-friendly products, you can create a category for sustainable products. Ultimately, the choice of product categories depends on your products, your customers, and your business goals.
Product tags are keywords that help customers find your products in search results. They are important for your online store's SEO.
When determining your product tags, you should consider the following:
Here are some examples of product tags (based on the examples in the categories above):
You can use tags specific to your business. To use the same example as before, if you sell eco-friendly products, you can use tags such as "sustainable," "eco-friendly," or "responsible."
By following these tips, you can create effective product pages that will help your customers make informed purchasing decisions.
The settings determine the appearance and functionality of your store, as well as the features it offers.
To configure your store settings, click the "Settings" button in the navigation bar. In the "E-commerce" tab, you can configure the following:
You can also configure additional settings, such as tax settings, language settings, and privacy settings.
For more information on configuring your online store settings, you can consult the Webflow documentation or contact the Easyweb team for personalized support.
Once you have configured your store, you will need to test it to make sure it is working properly. To do this, please see step 4 below. 🙂
Here are a few tips for setting up your store in Webflow:

Once your store is set up, you can customize your Webflow website in a variety of ways, such as changing the site design, adding additional content elements, or integrating third-party applications.
To change the design of your site, you can use Webflow's customization tools. You can change the colors, fonts, sizes, margins, animations, or even the effects of your website. You can also change the layout of your site by adding, removing, or modifying sections, columns, and blocks.
To change the design of your site, follow these steps:
You can add additional content elements to your site, such as text, images, videos, links, or forms. You can add these content elements directly to your site's pages or use predefined content blocks.
To add additional content elements to your site, follow these steps:
You can integrate third-party apps into your site, such as payment services, marketing services, or even social media services. To integrate a third-party app, you need to obtain the app's API and configure it in your Webflow website. Feel free to read our article on Webflow integrations to enhance your website with these tools.

Once you have customized your site, you need to test it to make sure it works properly. You can test your site by browsing it yourself or asking a friend or family member to do so. Make sure your store is working properly before launching it to the public. Browse your site and try to make a purchase to ensure that everything is working as expected.
Properly testing your website is essential to ensure that it works correctly and is accessible to all users. Website testing involves checking all of the site's features, identifying any problems, and proposing solutions.
There are several steps to follow to properly test your website:
Testing the accessibility of a website involves checking that the site is accessible to all users, including people with disabilities. This means that the site must be usable by people with visual, hearing, motor, or cognitive impairments.
There are several methods for testing the accessibility of a website. One method is to use accessibility testing tools. These tools analyze the site's code and identify any accessibility issues.
Another method is to test the site manually. This involves browsing the site using different devices and assistive technologies. You can also ask people with disabilities to test the site for you.
It is essential to check that the website's features are working properly. These include links, forms, buttons, and menus.
Here are some tips for testing website features:
Here are some examples of specific feature tests you can perform:
By performing these tests, you can ensure that your website is functional and meets the needs of your users.
Testing website navigation involves checking that the site's navigation is intuitive and easy to understand. Make sure that users can easily find the information they are looking for.
To test a website's navigation, you can follow these steps:
Testing the content of a website involves verifying that the site's content is correct, up to date, and relevant. Make sure the text is clear and easy to understand.
Here are two important tips for testing website content:
Effectively testing your website's performance is essential to ensuring a good user experience and improving your search engine ranking. There are several methods for testing your website's performance. One method is to use performance testing tools. These tools analyze your site's code and identify any performance issues. Another method is to test the site manually. This involves opening your site on different devices and browsers and noting the page load times.
Here are a few things to check when testing your website's performance:
Testing your site on different devices is essential to ensure that it displays correctly for all users. Mobile devices, such as smartphones and tablets, are increasingly being used to access the Internet. It is therefore important to ensure that your site displays correctly on these devices.
Here are a few reasons why it is important to test your site on different devices:
Ask real users to test your site and give you feedback. This will help you identify issues you may not have noticed.
Here are some additional tips for testing your website:
By testing your website thoroughly and regularly, you can ensure that it is of high quality and meets the needs of your users.
.webp)
Once you have tested your site and are satisfied with the results, you can launch it. To launch your site, you must publish it.
To publish your Webflow site, you must first enable publishing. You can do this by following these steps:
Once publishing is enabled, you can publish your site by following these steps:
You can now choose to publish your site to a Webflow domain or a custom domain. If you choose to publish your site to a Webflow domain, you won't need to purchase a domain name. Webflow will provide you with a free domain.
If you choose to publish your site on a custom domain, you will need to purchase a domain name from a domain name provider. In this case, don't forget to configure your domain name's DNS settings to point to the Webflow server.
Webflow e-commerce sites offer many advantages for entrepreneurs and businesses of all sizes. They offer great design freedom, complete data control, and fast performance.
Here are some of the specific advantages of Webflow e-commerce sites:
Of course, Webflow e-commerce sites also have some drawbacks. They can be more complex to use than other e-commerce platforms, and they can be more expensive.
In general, Webflow e-commerce sites are a good option for entrepreneurs and businesses that want to create a unique, customized e-commerce site with complete control over data and fast performance.
Here are some tips for creating a successful Webflow e-commerce site:
If you follow this article to the letter, you have everything you need to create an e-commerce site on Webflow that will be both attractive and effective.


